How to Move a WordPress Site to Another Host
Before we start, we want you to know that a lot of hosting companies offer a free migration / transferring service. It might not be listed on their website, so all you have to do is ask. Usually, it’s free, but some may charge a small fee.
Ex-: Namecheap Hosting provider transfer full cPanel to another free…
How to Move a WordPress Site to Another Host:
In this step-by-step tutorial, we describe,
- How to Backup WordPress site/database from cPanel
- Upload the backup to your hosting account
- Import the database
- Create a new database user
- Edit the configuration details
1. How to Backup WordPress site/database from cPanel
Before transfer, you need to backup your site and database. Please read this article to Backup the WordPress site from cPanel.
Click here to read How to back up and download your WordPress site.
How to backup MySQL database
1. Log in to cPanel.
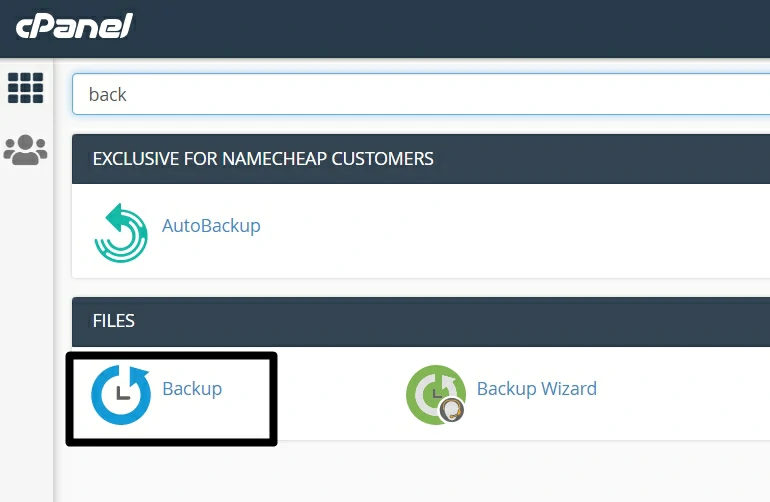
2. Search Backup then click on open “Backup“
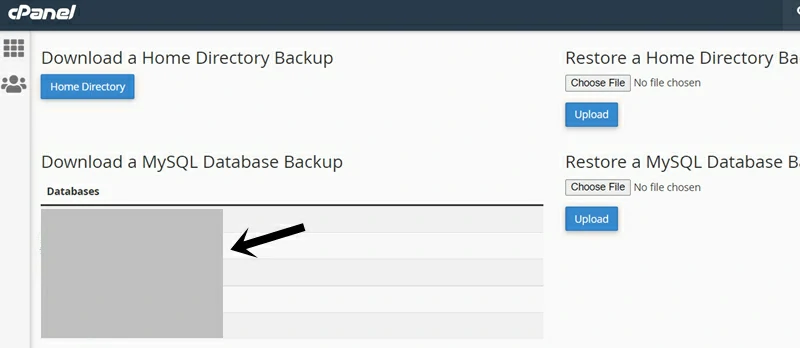
3. On the Backup page Scroll down and find “Download a MySQL Database Backup” Then click on the database name that you want to download.
2. Upload the backup WordPress site to your hosting account
1. Log into your cPanel account
2. Next, go to the File Manager menu in the Files section.
3. Move to your domain’s root folder. Files for the main hosting domain are located in the public_html folder. In case you wish to transfer the website of an addon domain, you can check the root folder in the Addon Domains menu. (kdapz.com)
New Host, Upload your WordPress Backup files to the public_html folder.
4. Click Upload in the File Manager toolbar.
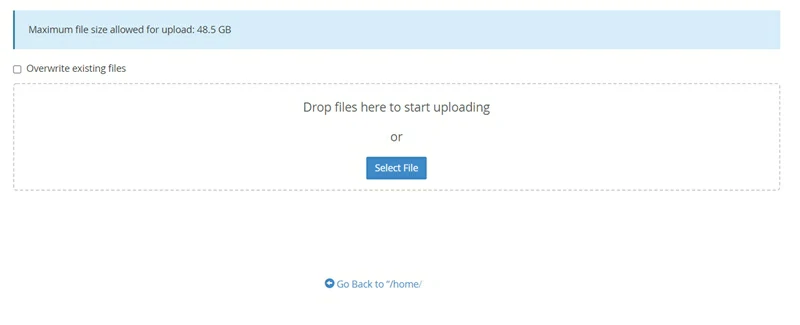
5. Use the Select File button to upload the backup of the files from your computer (e.g., wp-name-of-website-number-date.tar.gz) or (wp-name-of-website-number-date.tar.zip)
PLEASE NOTE: If your backup file is large, compress it to a zip file then upload. Or transfer it using FTP.
6. When the upload is complete, click Go Back to the root folder of the domain. Right-click the uploaded file and select Extract to extract files into the working directory.
3. Import the database
Previously we downloaded the site MySQL database. Now we need to upload it into the new host database. Now go to Backup Page again.
On Backup Page Upload your Backup database by clicking on UPLOAD.
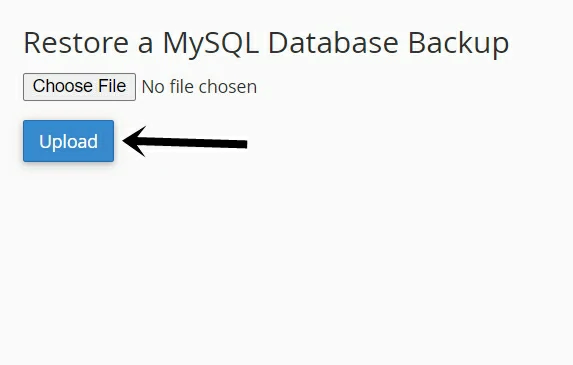
After Complete. Now you have to create a new user for that database.
4. Create a new database user
In your cPanel search MySQL. Then click on MySQL® Databases.
Now scroll down and find MySQL Users. Now let’s create a new user.
Add username and password. (use Strength password) Then click on Create User.
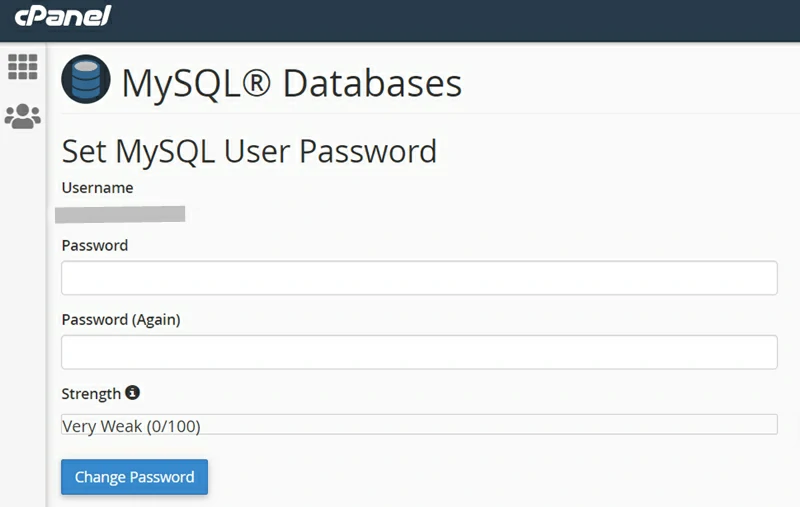
A strong password is very important to maintain security. Web servers are usually more powerful and have access to greater bandwidth than your personal computer, which makes them a prime target for password crackers. So we strongly recommend using a powerful password.
After creating a new user you will receive a success message.
Click on Go Back. Now we have to Add a User To Database (recently we uploaded)
Again go to the MySQL® Databases page and scroll down. Then find Add User To Database field.
- Select the user
- Select the database
after that, click on Add.
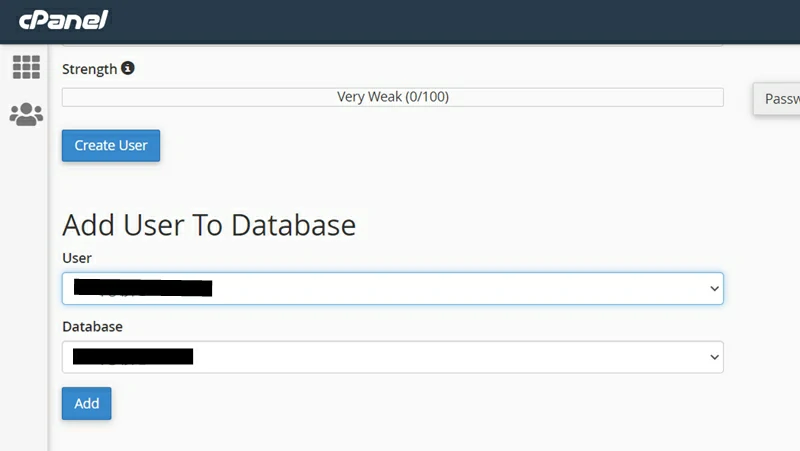
Now you will redirect to the Manage user Privileges page. If not manually change it. Select All and click on Make Changes.
Now you have to edit the configuration details.
5. Edit the configuration details
Save all the details that you provide. (on notepad)
- Database name
- Database username
- Database password
- Database server
Now go to File Manager and in your site root folder search for wp-config.php.
Then right-click on wp-config.php and click on Edit. Now scroll down and find these codes.
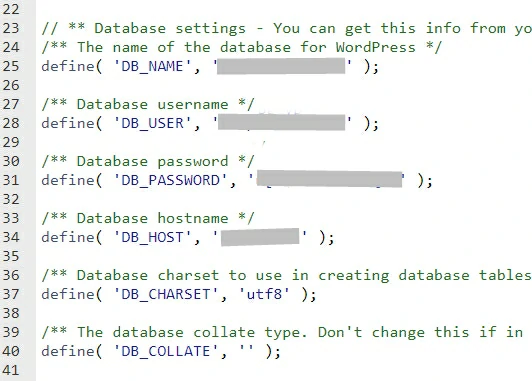
Find the MySQL settings line and replace the database name, database username, and password with your actual values. Also, change the MySQL hostname to localhost.
Now you need to make sure that the information for the database name, username, password, and database host is correct.
- Check database name matches to (wp-config.php) database name
- Check database username matches to (wp-config.php) database username
- Check database password matches to (wp-config.php) database password
- Check database host matches to (wp-config.php) database host
Now you need to Update Your Domain Name Servers (DNS).
At this point, you’ve created a complete copy of your WordPress database and files on your new hosting server, but your domain still points to your old web hosting account.
To update your domain, you need to switch your DNS nameservers. This ensures that your users are taken to the new location of your website when they type your domain into their browsers.
Click here to read How to Update Your Domain Name Servers (DNS)?
If you have any problems please comment below, We are always here to help you. And also share your ideas with us!!


